2.8. Processes#
As said before, Unix is a multi-tasking operating system, like many operating systems nowadays (examples of single-tasking operating systems are Apple’s MacOS and Microsoft DOS, both of which are very old). Multi-tasking means that more than one program (or process) can run (seemingly) at the same time. However, as there are usually more processes than processors, what really happens is that each process runs for a little while, say 20 milliseconds, and then another process is run, in turn.
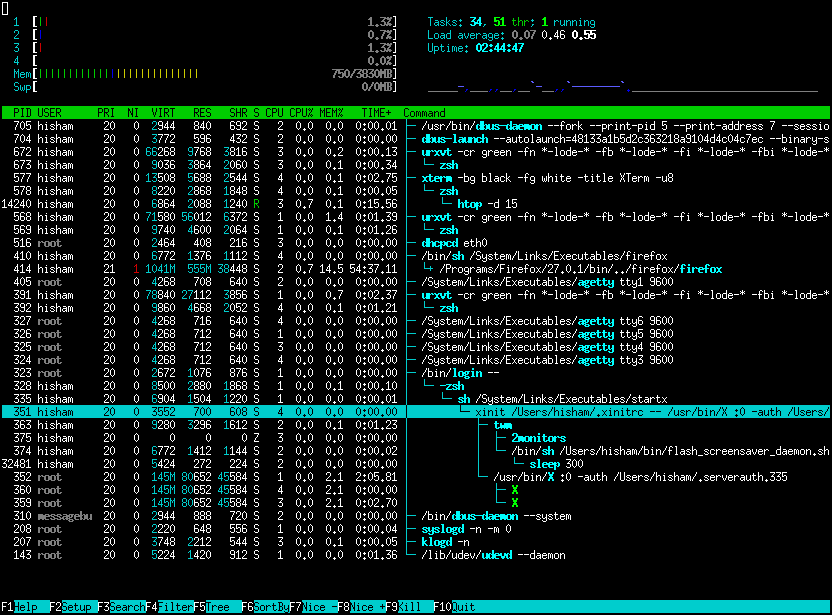
Fig. 2.11 A process monitor, htop, showing processes being started and stopped, affecting CPU and memory usage.#
Image source: https://htop.dev/screenshots.html .
First, we’ll discuss how you can view your own processes and learn more about them. Next, it is shown how you can control your processes.
2.8.1. Inspecting processes#
The most useful command to inspect running processes is ps, for process status. Try this:
$ ps
The output should look like this:
  PID TTY          TIME CMD
 1736 pts/0    00:00:00 bash
 2211 pts/0    00:00:00 ps
There are two processes in your current shell: bash (the shell you are currently running) and ps itself. The first column of the output shows the process identification number (PID). Each process has a unique number. The next column shows in which terminal this process is running; in this case it’s your first terminal named pseudo-terminal 0 (pts/0). Next, ps shows how much time has been used by the process so far. As usually these commands run very quickly, here it’s 00:00:00, or less than 0.5 seconds. Finally, ps shows the command name of the process.
To get more information, specify the option u to ps. Try this. You will get a lot of (cryptic) information, such as the PID (process identification number) of the processes and the size in memory (RSS) in kilobytes. Also interesting is the STAT field, which shows the status of the process: S for “sleeping”, R for “running” and so on. Note that “sleeping” means “currently not running on the processor”; it might be running in another 20 milliseconds or so!
The ps command has a lot of options. Besides u, a useful one is a, which also shows you the processes of other uses Try this:
$ ps au
You will see that root is running a lot of getty processes — these are the virtual terminals you encountered in Section 2.4.3. A very useful combination of options is aux (look at the man page of ps to find out what this does):
$ ps aux | less
2.8.2. Process tree#
When you run ps aux, the first process you should see in this list, the one with PID 1, is the “mother of all processes”, /sbin/init.
All this special process does is create other processes based on initialisation files.
The Unix system only starts a process when it is instructed to by some other process.
Even when you as a user start a new process using some command (like date) in the bash shell, it is in fact that bash process that will initiate the new date process.
This means there’s a hierarchy of processes: each process has a parent process, and a process may have zero or more child processes.
To get a view of this hierarchy, try this:
$ pstree
Note that pstree should also shows itself as a child process of a bash process.
Note
On current Ubuntu systems, you may notice that the root process of pstree is not in fact /sbin/init, but something else called systemd.
Due to the modular design of Linux , different distributions may use different initialization systems, and Ubuntu is designed to use a system called systemd as default.
You can verify this by inspecting /sbin/init on your system more closely with ls:
$ ls -l /sbin/init
The output should show you that the file name /sbin/init is actually a link to systemd, as indicated by the arrow ->.
Exercise 2.100
From your current shell, start another shell by entering bash. Do this twice more. Use ps and pstree again to inspect the processes. Do they confirm what you think happened? Exit the spurious shells by typing exit three times.
2.8.3. Foreground and background processes#
You will have noticed that when you start a process from the shell, it will not prompt you again until the process is finished. In some cases, you might want to start a process but return to the prompt immediately. This is especially useful for programs that run for a long time, such as long calculations.
Exercise 2.101
To start a process in the background, put an ampersand (&) behind the command name. For example, try:
$ openssl speed >& speed.log &
The output should be something like:
[1] 2350
which means that the shell has started the first background process ([1]) and it has process number 2350. The openssl speed command measures your processor’s competence at cryptographic tasks.
Remember that the >& speed.log means that all output should be written to the file speed.log instead of the screen. This is important; if a process is running in the background and it writes to the screen, it will mess up the foreground programs.
Exercise 2.102
To find out whether your process is still running, use ps. You can however also use jobs, which shows the current background processes:
$ jobs
[1]+  Running                 openssl speed &>speed.log &
You can move the process back to the foreground using fg <job>. In this case, if you enter fg 1 (or just fg), your process will return to the foreground, and you will not get your prompt back.
To suspend a process, press Ctrl-Z while it’s running. You will get the prompt back, and again you can decide whether you want to run it in the foreground (fg) or you want to run it further in the background (bg). Try suspending your openssl-process and moving it to the background.
Remember: per terminal, there can be only one process in the foreground at the same time!
2.8.4. Killing processes#
Now you know how you can move processes to the background and the foreground, you might wonder how you can stop processes. The simplest solution, when the process is running in the foreground, is to press the “interrupt” key, Ctrl-C.
Exercise 2.103
Move your openssl process back to the foreground (or start a new one if it’s finished already), and stop it using Ctrl-C.
Another option is to use kill. You can use kill in two ways:
kill <PID>will stop the process with the specified process identification numberPID;kill %<job>will stop the process running as job numberjobin the current shell.
Exercise 2.104
Have a look at the man page of the command sleep. What does it do?
Start the process sleep 300 & and look at the job number return (e.g., [1]). Stop it using the job number, e.g. kill %1. Start it again, and now kill it using the PID.
Actually, the kill command sounds far worse than it is. It really just sends a signal to a process asking it nicely to please do whatever is necessary to stop, such as saving files, cleaning up etc. Sometimes however, programs are crashed and will not respond to the nice request. In that case, you can force such a runaway process to die by using kill -9 <PID> or kill -9 %<job>.
2.8.5. Nice!#
It was already discussed how processes are run in turn, each receiving a small amount of time, to give the user the impression all processes are running at the same time. To get a nice, interactive overview of all these processes, you can use the top command:
$ top
which you can leave by pressing q.
But how does Unix decide which process to run at any given time? The basic idea is to run each process as often as each other process. However, some processes should have a higher priority, such as processes which regulate hard disk access, network transport, the clock etc.
To allow processes to have higher priority, each process has a value called nice. The nicer processes are, the less priority they get. The default value for each process is 0; the nicest level is 19, and the level with the highest priority is -20. To prevent normal users from attaching too high a priority to their own processes, you can only assign “nicer” levels to your processes; that is, the nice level can only be increased. Only the system administrator can give processes a lower nice level and thus a higher priority.
Exercise 2.105
Start three long-running processes like this:
$ openssl speed >& /dev/null &
$ nice -n 10 openssl speed >& /dev/null &
$ nice -n 15 openssl speed >& /dev/null &
Note the /dev/null device: everything you write to it is thrown away, which can sometimes be very useful to get rid of unwanted output.
Now inspect how much time each process gets on the processor, using top.
Finally, kill all three processes using killall openssl (what does killall do? Have a look at the man page.).
Besides starting processes with nice, you can also use renice to change the nice level of a running process, or press r while in top.
It’s often important to be nice, especially if you’re working with a large number of people on a single machine.
2.8.6. Suspending and restarting terminal sessions#
You now know how you can suspend processes, make them run in the background, and bring them back to the foreground. Unfortunately, this does not work across multiple terminal sessions. This may be important when you are running an interactive process across the network, and you want to access it from two different computers (say, at work and at home). The screen command helps you do this.
Exercise 2.106
If screen is not yet installed on your computer, install it first:
$ sudo apt install screen
Once installed, you can start screen by simply running
$ screen
Skip through the copyright notice.
You will see a new prompt on an empty screen: this is a new bash shell process running in the new screen session you just started.
Let’s try to run some long running command in this new shell. For example, start the following command
$ top
Without stopping top, close the terminal (just use the mouse to press the close button of the terminal window).
By stopping the terminal process, it will also kill the original shell and screen command that you started.
However, the screen session with the new bash shell you started is still running in the background, as we shall see.
Open a new terminal, and use the screen command to confirm that you still have running a screen session.
$ screen -list
you should see something like
There is a screen on:
	4471.pts-3.srv227	(07/19/2010 11:30:12 AM)	(Attached)
1 Socket in /var/run/screen/S-wcaarls.
You can now take over this session in your new terminal by typing
$ screen -r
Notice how the top program kept running in your absence and how the contents of the terminal are transferred (reattached) to the new session.
If you forgot to close the first terminal, you would need to run screen -dr, to first detach the previous session.
screen has some useful keyboard shortcuts, described in the manual pages. They all start with Ctrl-A, followed by another key. Some frequently used ones are:
Ctrl-A d detach session (the screen session is still running in the backround);
Ctrl-A \ quit session, killing all running commands in it;
Ctrl-A c create a new window;
Ctrl-A Ctrl-a switch to the last used window.
Ctrl-A n switch to the next window;
Ctrl-A p switch to the previous window.
When working on your desktop, it may remain more convenient to just open multiple terminals if you need multiple shells. However, being able to use multiple windows in a single session is particularly useful when working over a network, as you don’t need to login over and over again.
Exercise 2.107
Create a new virtual terminal in your screen session (The same one you where using for the previous exercises). Now, start the nano editor. Now detach (Ctrl-A d) and killall top (in case top from the previous exercise is still running).
Reattach (screen -r) and switch to the first window (Ctrl-A Ctrl-a) to check that top is really terminated.
Then quit screen, killing all running commands (Ctrl-A \).
Note that it’s quite easy to leave screen sessions lying around.
Make sure to use screen -list to see if you’ve forgotten to close any.