3.3. Using a rqt as a GUI#
Next, let’s take a quick look at rqt,
which can provide various graphical user interface (GUI) tools for common simple ROS 2 tasks.
Everything done in rqt can be done on the command line,
but rqt sometimes provides a more user-friendly way to manipulate ROS 2 elements.
On the other hand, not everything that can be done on the commandline can be done with rqt,
and you can’t script GUIs like you can do with shell commands.
3.3.1. Start turtlesim#
With all your terminal closed, let’s setup a new ROS graph by starting a few nodes. First start turtlesim again, by entering the following command in your terminal:
$ ros2 run turtlesim turtlesim_node
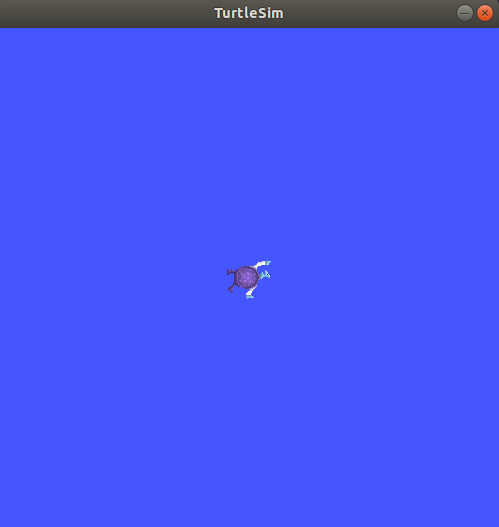
The simulator window should appear, with a random turtle in the center.
In the terminal, under the command, you will see messages from the node:
[INFO] [turtlesim]: Starting turtlesim with node name /turtlesim
[INFO] [turtlesim]: Spawning turtle [turtle1] at x=[5.544445], y=[5.544445], theta=[0.000000]
There you can see the default turtle’s name and the coordinates where it spawns.
Now open a second terminal (and source ROS 2 setup again! Remember this needs to be done for each terminal.).
In this second terminal, start a new turtle_teleop_key node to control the turtle in the first node:
$ ros2 run turtlesim turtle_teleop_key
At this point you should have three windows open: a terminal running turtlesim_node,
a terminal running turtle_teleop_key and the turtlesim window.
Arrange these windows so that you can see the turtlesim window, but also have the terminal running turtle_teleop_key active so that you can control the turtle in turtlesim.
3.3.2. Open a GUI window with rqt#
Now let’s look at a simple example of controlling the nodes using rqt
Open another terminal (and don’t forget to source your ROS environment).
ROS provides a handy built-in command so you don’t have to use any ros2 ... commands to start it.
Instead, simply enter:
$ rqt
Note
For RSP students, Rqt should already be installed in your singularity image!
If you would use a new clean ROS install, you might still need to install it manually first.
To install rqt and its plugins you would then use
$ sudo apt update
$ sudo apt install '~nros-humble-rqt*'
When running rqt for the first time, the window will be blank.
3.3.3. Load a Service Caller plugin in rqt#
No worries; just select Plugins > Services > Service Caller from the menu bar at the top.
Note
It may take some time for rqt to locate all the plugins.
If you click on Plugins but don’t see Services or any other options, you should close rqt and enter the command rqt --force-discover in your terminal.
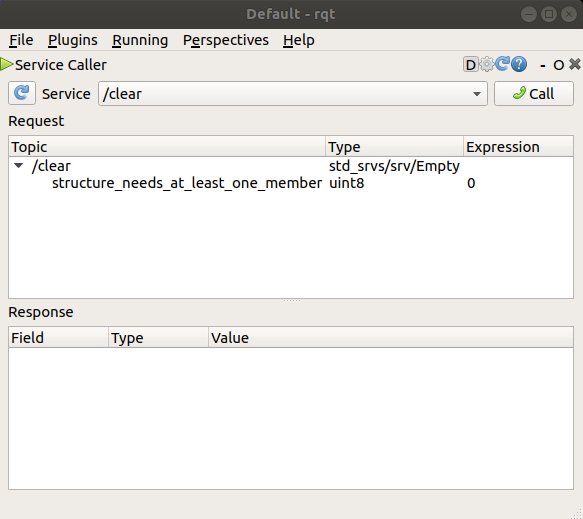
Use the refresh button to the left of the Service dropdown list to ensure all the available services of your running turtlesim_node ROS program are shown.
3.3.4. Spawn another turtle using a “service call”#
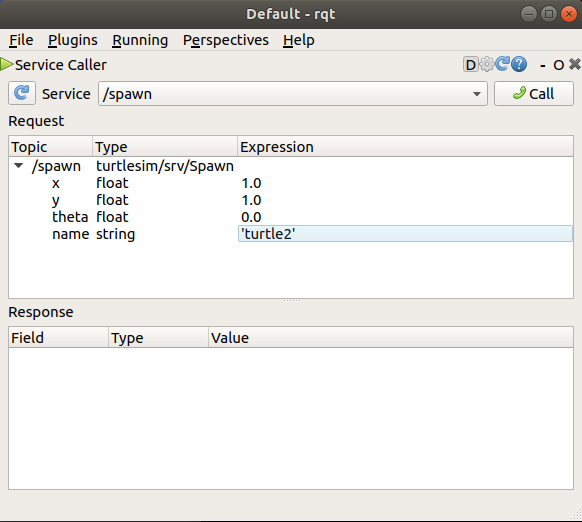
Let’s use rqt to call the /spawn service.
Click on the Service dropdown list to see turtlesim’s services, and select the /spawn service.
You can guess from its name that /spawn will create another turtle in the turtlesim window.
Give the new turtle a unique name, like turtle2, by double-clicking between the empty single quotes in the Expression column.
You can see that this expression corresponds to the value of name and is of type string.
Next enter some valid coordinates at which to spawn the new turtle, like x = 1.0 and y = 1.0.
Note
If you try to spawn a new turtle with the same name as an existing turtle, like the default turtle1, you will get an error message in the terminal running turtlesim_node:
[ERROR] [turtlesim]: A turtle named [turtle1] already exists
To spawn turtle2, you then need to call the service by clicking the Call button on the upper right side of the rqt window.
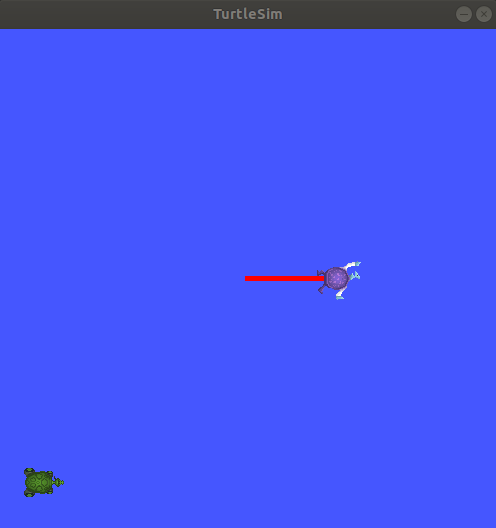
If the service call was successful, you should see a new turtle (again with a random design) spawn at the coordinates you input for x and y.
If you refresh the service list in rqt, you will also see that now there are services related to the new turtle, /turtle2/..., in addition to /turtle1/....
3.3.5. Try the “set_pen” service#
Now let’s give turtle1 a unique pen using the /set_pen service:
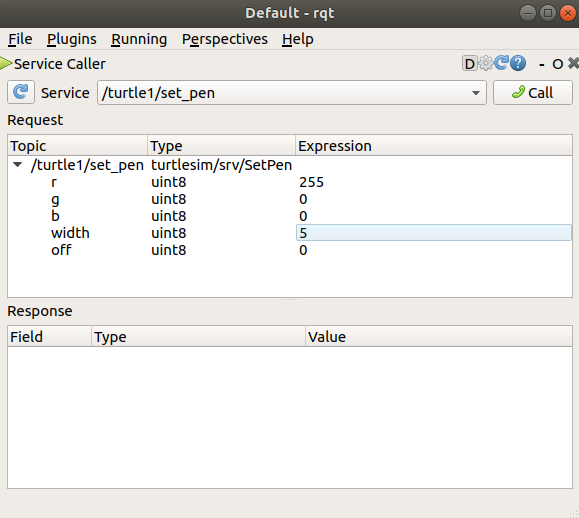
The values for r, g and b, which are between 0 and 255, set the color of the pen turtle1 draws with, and width sets the thickness of the line.
To have turtle1 draw with a distinct red line, change the value of r to 255, and the value of width to 5.
Note
After updating the values, don’t forget to use the Call button in rqt to actually send the service request to the turtlesim_node program!
If you return to the terminal where turtle_teleop_key is running and press the arrow keys, you will see turtle1’s pen has changed.
You’ve probably also noticed that there’s no way to move turtle2.
That’s because there is no teleop node for turtle2.
3.3.6. Remapping topics#
Now let’s take a look at a more advanced feature of ROS: the ability to “remap a topic”.
While not all the underlying mechanisms have to be clear at this stage, they give you some understanding of how ROS can be used to create more complex program interactions.
We will use this feature to control our latest turtle, turtle2, with a second teleop node.
First, let’s open yet another terminal (source the workspace!).
To control turtle2, we could just try and run the same command as before to start a second turtle_teleop_key:
$ ros2 run turtlesim turtle_teleop_key
But… if you press the arrow keys in this latest terminal, you will notice that this one also controls the first turtle, turtle1, and not the second one!
The way to change this behavior is by remapping the “topic” of the second turtle_teleop_key process, such that it sends its velocity commands to the correct turtle.
Note
For now, you can think of this “topic” as a communication channel between the turtle_teleop_key and the turtlesim_node programs, which is used to send the control messages over.
Since every turtle_teleop_key process sends by default its commands to a topic called turtle1/cmd_vel,
the receiving turtlesim_node will use all these messages for the turtle called turtle1.
You will learn about ROS 2 topics later in more detail in the core concepts and topics sections of this manual.
Stop this second turtle_teleop_key process by pressing CTRL-C in the terminal.
Now we will start it again, but add additional commandline options to ensure it will send its velocity update to the turtle2/cmd_vel topic for our latest turtle:
$ ros2 run turtlesim turtle_teleop_key --ros-args --remap turtle1/cmd_vel:=turtle2/cmd_vel
The additional commandline options can be understood as follows:
--ros-argsindicates that everything that follows should be used to configure the fundamental ROS behavior of the node. This is not specific forturtle_teleop_key, but possible with any ROS node.--remapoption furthermore indicates that what will follow is a topic remapping.turtle1/cmd_vel:=turtle2/cmd_velfinally configures the remapping. It states that for the node we are about to start (i.e., the secondturtle_teleop_key), its topicturtle1/cmd_velshould be known for any other nodeturtle2/cmd_vel. This works, because theturtlesim_nodethat manages and displays the turtles expect velocity commands forturtle2to arrive at that topic.
Note
If it didn’t work, try again and double check that you used all the special characters exactly as indicated here.
For instance, you must use := instead of =.
If you did not name your second turtle turtle2, you do need to replace that name in the remapping command above.
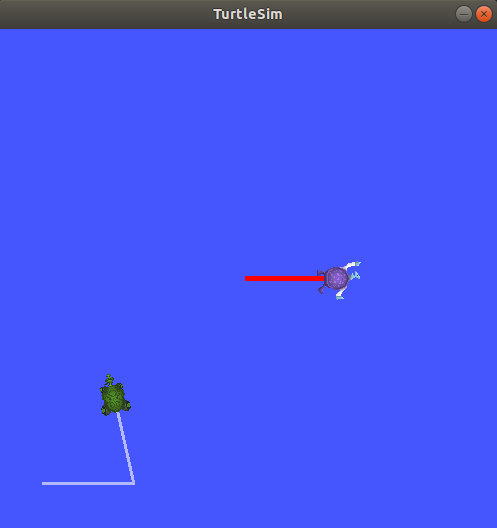
Now, you can move turtle2 when this terminal is active, and turtle1 when the other terminal running turtle_teleop_key is active.
3.3.7. Clean up#
To stop the simulation, you can enter Ctrl + C in the turtlesim_node terminal,
and q in the turtle_teleop_key terminals.