6.2. Creating a launch file#
As you learned in Section 6.1,
the launch system in ROS 2 is responsible for helping the user describe
the configuration of their ROS 2 application in launch files, and ros2 launch will then start the described nodes.
A launch file states what programs to run, where to run them, what arguments to pass them, and ROS-specific conventions. This makes it easy to reuse multi-node components throughout the system by launching a launch file multiple times with only a few different options.
Launch files written in Python, XML, or YAML can start and stop different nodes as well as trigger and act on various events. See Using Python, XML, and YAML for ROS 2 Launch Files for a description of the different formats.
The package providing this framework is launch_ros, which uses the non-ROS-specific launch framework underneath.
Note
While a Python launch file can be more flexible than one in XML or YAML, it is also more complex and verbose (ie: longer). For simple launch files XML can still be the preferred choice.
In this section we will only show you how to create XML launch files. If you want to know how to create Python or YAML launch files, please refer to the ROS 2 documentation on creating launch files on which this manual section is based.
Warning
The launch system of ROS 1 only supported XML syntax, though there are some subtle differences with the XML syntax now used in ROS 2. Refer to the ROS 1 to ROS 2 migration guide in case you ever need to adapt ROS 1 launch files to ROS 2.
Let’s put together an XML launch file using the turtlesim package and
its executables.
The goal will be to launch two
turtlesim windows and have one turtle mimic the movements of the other.
As always, don’t forget to source ROS 2 in every new terminal you open.
6.2.1. Write the launch file#
Create a new directory to store your launch files:
$ mkdir launch
$ cd launch
Copy and paste the following XML code into a new mimic.launch.xml file
in this launch/ directory:
<launch>
  <node pkg="turtlesim" exec="turtlesim_node" name="sim" namespace="turtlesim1"/>
  <node pkg="turtlesim" exec="turtlesim_node" name="sim" namespace="turtlesim2"/>
  <node pkg="turtlesim" exec="mimic" name="mimic">
    <remap from="/input/pose" to="/turtlesim1/turtle1/pose"/>
    <remap from="/output/cmd_vel" to="/turtlesim2/turtle1/cmd_vel"/>
  </node>
</launch>
A short primer on XML syntax
XML (eXtensible Markup Language) is a versatile markup language used for encoding documents in a format that is both human-readable and machine-readable. It is widely used for storing and transporting structured data across different systems. Here is a short overview of the basic concepts and syntax.
Tags:
Tags are the fundamental building blocks of XML.
A tag is a piece of markup that encloses data. It consists of a start tag and an end tag.
The start tag is denoted by
<tagname>, and the end tag is denoted by</tagname>.The data of a tag can be a simple string, but also one or more other tags, or it can be empty.
XML tags are case-sensitive, meaning
<TagName>and<tagname>would be considered different tags.Example of a tag containing data:
<greeting>Hello, World!</greeting>
Here, <greeting> is the start tag, and </greeting> is the end tag.
The text “Hello, World!” is the content enclosed by the greeting tag.
Nesting Tags:
Tags can be nested within other tags to create a hierarchical structure.
White spaces (indentation) between tags is ignored by the computer, but can be added to make the tag hierarchy more easily visible for humans.
An XML document must have one and only one outermost root tag that encompasses all other content.
Example of nested tags:
<note>
    <to>Tove</to>
    <from>Jani</from>
    <heading>Reminder</heading>
    <body>
        <content>Don't forget me this weekend!</content>
    </body>
</note>
In this example, the <note> tag is the root of this document and contains four nested tags: <to>, <from>, <heading>, and <body>.
The <body> tag itself has a single <content> tag.
Empty tags:
A tag with no content can be written as
<tagname></tagname>, but there is also a shorthand:<tagname/>(notice the slash at the end).Example of a root with two empty
<hr>tags:
<note>
    <body>
        <hr></hr>
        <hr />
    </body>
</note>
Attributes:
Any start tags can also have attributes that provide additional information.
Example of tags with attributes:
<note date="2024-09-30" id="8da35f9">
    <body language="english">Don't forget me this weekend!</body>
    <config color="yellow" />
</note>
In this example, the <note> tag has an attribute date with the value 2024-09-30 and an atribute id with the value 8da35f9.
The <body> tag has one attribute language with the value english.
The empty <config> tag has one attribute color with the value yellow.
What tags and attributes are allowed/necessary?
The XML syntax itself does not specify what kind of tags you can/must use in document. Instead, it depends on your use case: what program is going to read that XML document, and what tags does it expect? A description of allowed tags and attributes for a particular application is called an XML schema.
For example, the XML schema for ROS launch files
defines that the root tag must be <launch>,
and that <node> tags can have pkg, exec, name and namespace attributes (among others).
6.2.2. Examine the launch file#
All of the launch files above are launching a system of three nodes, all
from the turtlesim package.
The first two actions launch the two turtlesim windows:
<node pkg="turtlesim" exec="turtlesim_node" name="sim" namespace="turtlesim1"/>
<node pkg="turtlesim" exec="turtlesim_node" name="sim" namespace="turtlesim2"/>
When launching these two turtlesim_node nodes,
they both receive the same node name sim,
and the only difference between them is
that we assign them different namespace values (turtlesim1 vs turtlesim2).
Important
Unique namespaces allow the system to start two nodes without node name or topic name conflicts!
Both turtlesim instances in this system receive commands over the similarly named topics and also publish their pose over the similarly named topic. By using unique namespaces, we automatically obtain unique node names, and unique topic names such that messages meant for different turtles can be distinguished.
For example, with the given namespaces:
the full name of the first node will become
/turtlesim1/simthe full name of the second node will become
/turtlesim2/simthe topic
/turtle1/poseof the first node will become/turtlesim1/turtle1/posethe topic
/turtle1/poseof the second node will become/turtlesim2/turtle1/pose
This final XML <node> tag launches the mimic node from the turtlesim package,
and simply calls it mimic.
<node pkg="turtlesim" exec="mimic" name="mimic">
  <remap from="/input/pose" to="/turtlesim1/turtle1/pose"/>
  <remap from="/output/cmd_vel" to="/turtlesim2/turtle1/cmd_vel"/>
</node>
Observe that the launch file also remaps two topics for this node
by including two <remap ... /> XML tags between the opening <node ...> and closing </node> XML tag.
mimic’s /input/pose topic is remapped to /turtlesim1/turtle1/pose and it’s /output/cmd_vel topic to
/turtlesim2/turtle1/cmd_vel.
This means mimic will subscribe to
/turtlesim1/sim’s pose topic and republish it for
/turtlesim2/sim’s velocity command topic to subscribe to.
In other words, turtlesim2 will mimic (or duplicate) turtlesim1’s movements.
6.2.3. Launch with ros2 launch#
To “launch” the launch file created above, call ros2 launch with the
filepath to launch file you created:
$ ros2 launch mimic.launch.xml
Note
As you can see from this command, it is possible to launch a launch file directly using ros2 launch.
However, in most cases you’d launch a launch file provided by a ROS 2 package.
You then simply need to add the package name, hence the syntax is:
$ ros2 launch <package_name> <launch_file_name>
You will learn about creating ROS 2 packages yourself in Section 8.2.
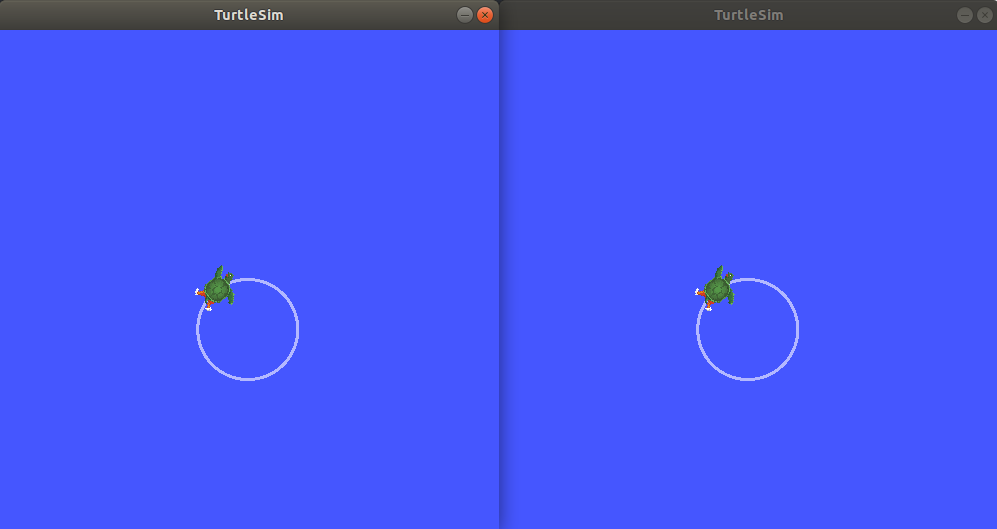
Two turtlesim windows will open, and you will see the following [INFO]
log messages telling you which nodes your launch file has started:
[INFO] [launch]: Default logging verbosity is set to INFO
[INFO] [turtlesim_node-1]: process started with pid [11714]
[INFO] [turtlesim_node-2]: process started with pid [11715]
[INFO] [mimic-3]: process started with pid [11716]
To see the system in action, open a new terminal and run the following
ros2 topic pub command on the /turtlesim1/turtle1/cmd_vel topic to
get the first turtle moving:
$ ros2 topic pub -r 1 /turtlesim1/turtle1/cmd_vel geometry_msgs/msg/Twist "{linear: {x: 2.0, y: 0.0, z: 0.0}, angular: {x: 0.0, y: 0.0, z: -1.8}}"
You should see both turtles following the same path in their respective windows.
6.2.4. Introspect the system with rqt_graph#
While the system is still running, open a new terminal and run
rqt_graph to get a better idea of the connections between the nodes
started by your launch file.
Run the command:
$ rqt_graph

A hidden node (the ros2 topic pub command you ran) is publishing data
to the /turtlesim1/turtle1/cmd_vel topic on the left, which the
/turtlesim1/sim node is subscribed to. The rest of the graph shows
what was described earlier: mimic is subscribed to
/turtlesim1/sim’s pose topic, and publishes to /turtlesim2/sim’s
velocity command topic.
6.2.5. Launch another launch file with your launch file#
Commonly, a ROS package provides one or a few launch files that start and configure several nodes in the package.
This way, complex system components can be started with a single call to ros2 launch.
Often we wish to combine such component to create even larger components or full robotic stacks,
which we can do by making a launch file execute other launch files too.
We call this mechanism “including” another launch file.
For example, if we have a launch file for the robot’s navigation stack, and another launch file for the robot’s perception stack, we can create one top-level launch file that launches both the files and initiates the complete perception plus navigation stack.
For XML launch files, we can include another launch file with the <include> tag,
which requires a file argument with the filepath to the other launch file
that we want to launch,
for example:
<include file="other-launchfile.launch.py" />
Note that it does not matter whether that other launch file is XML, Python, or YAML based.
How can we know the filepath for a launch file in some ROS package,
which could be installed in any workspace (overlay or underlay) on the system?
For this, ROS provides some substitution syntax that can be used in its XML data or tag arguments.
This substitution syntax can be used, for instance, to lookup the file path of a package.
Since launch files are typically installed in the launch/ directory of a ROS package’s shared resources (config files, launch files, etc.),
we can use the substitution syntax $(find-pkg-share <package-name>) to construct the full path to a launch file in a ROS package with the given name.
for example, if we have a package my_package with a launch file doit.launch.py, we would use:
<include file="$(find-pkg-share my_package)/launch/doit.launch.py" />
Note
In this manual we won’t discuss all substition rules that ROS XML launch files offer,
but you can recognize them by the $(...) syntax.
For more examples and a list of built-in substitions, please look at the end of the ROS 2 launch XML design document.
Ok, let’s apply this knowledge now to delegate the job of starting the two turtlesim_node processes to the pre-existing multisim.launch.py launch file provided by the turtlesim package,
which you used in Section 6.1.2.
From that previous section we know that that launch files also starts two turtlesim_node processes with the same namespace settings as we did in mimic.launch.xml, so it should be a perfect replacement.
Update your mimic.launch.xml file,
and replace the two <node> tags by a single <include> tag that calls the turtlesim’s launch file. Your mimic.launch.xml should now look like this:
<launch>
  <include file="$(find-pkg-share turtlesim)/launch/multisim.launch.py" />
  <node pkg="turtlesim" exec="mimic" name="mimic">
    <remap from="/input/pose" to="/turtlesim1/turtle1/pose"/>
    <remap from="/output/cmd_vel" to="/turtlesim2/turtle1/cmd_vel"/>
  </node>
</launch>
Try launch this file again, and notice that the behavior remains unchanged as we still start two turtlesims! We have successfully launched an external package’s launch file from our custom launch file.
6.2.6. Summary#
Launch files simplify running complex systems with many nodes and specific configuration details, avoiding the need to manually start multiple nodes in multiple terminals.
You can create launch files using Python, XML, or YAML, and run them using the
ros2 launchcommand.You learned some basic XML launch file syntax for defining what nodes to run, how to name them, how to remap their topics, and how to assign them namespaces.
You learned how launch files can launch other launch files from other packages using the
<include>tag.