5.4. Nodes and the Graph#
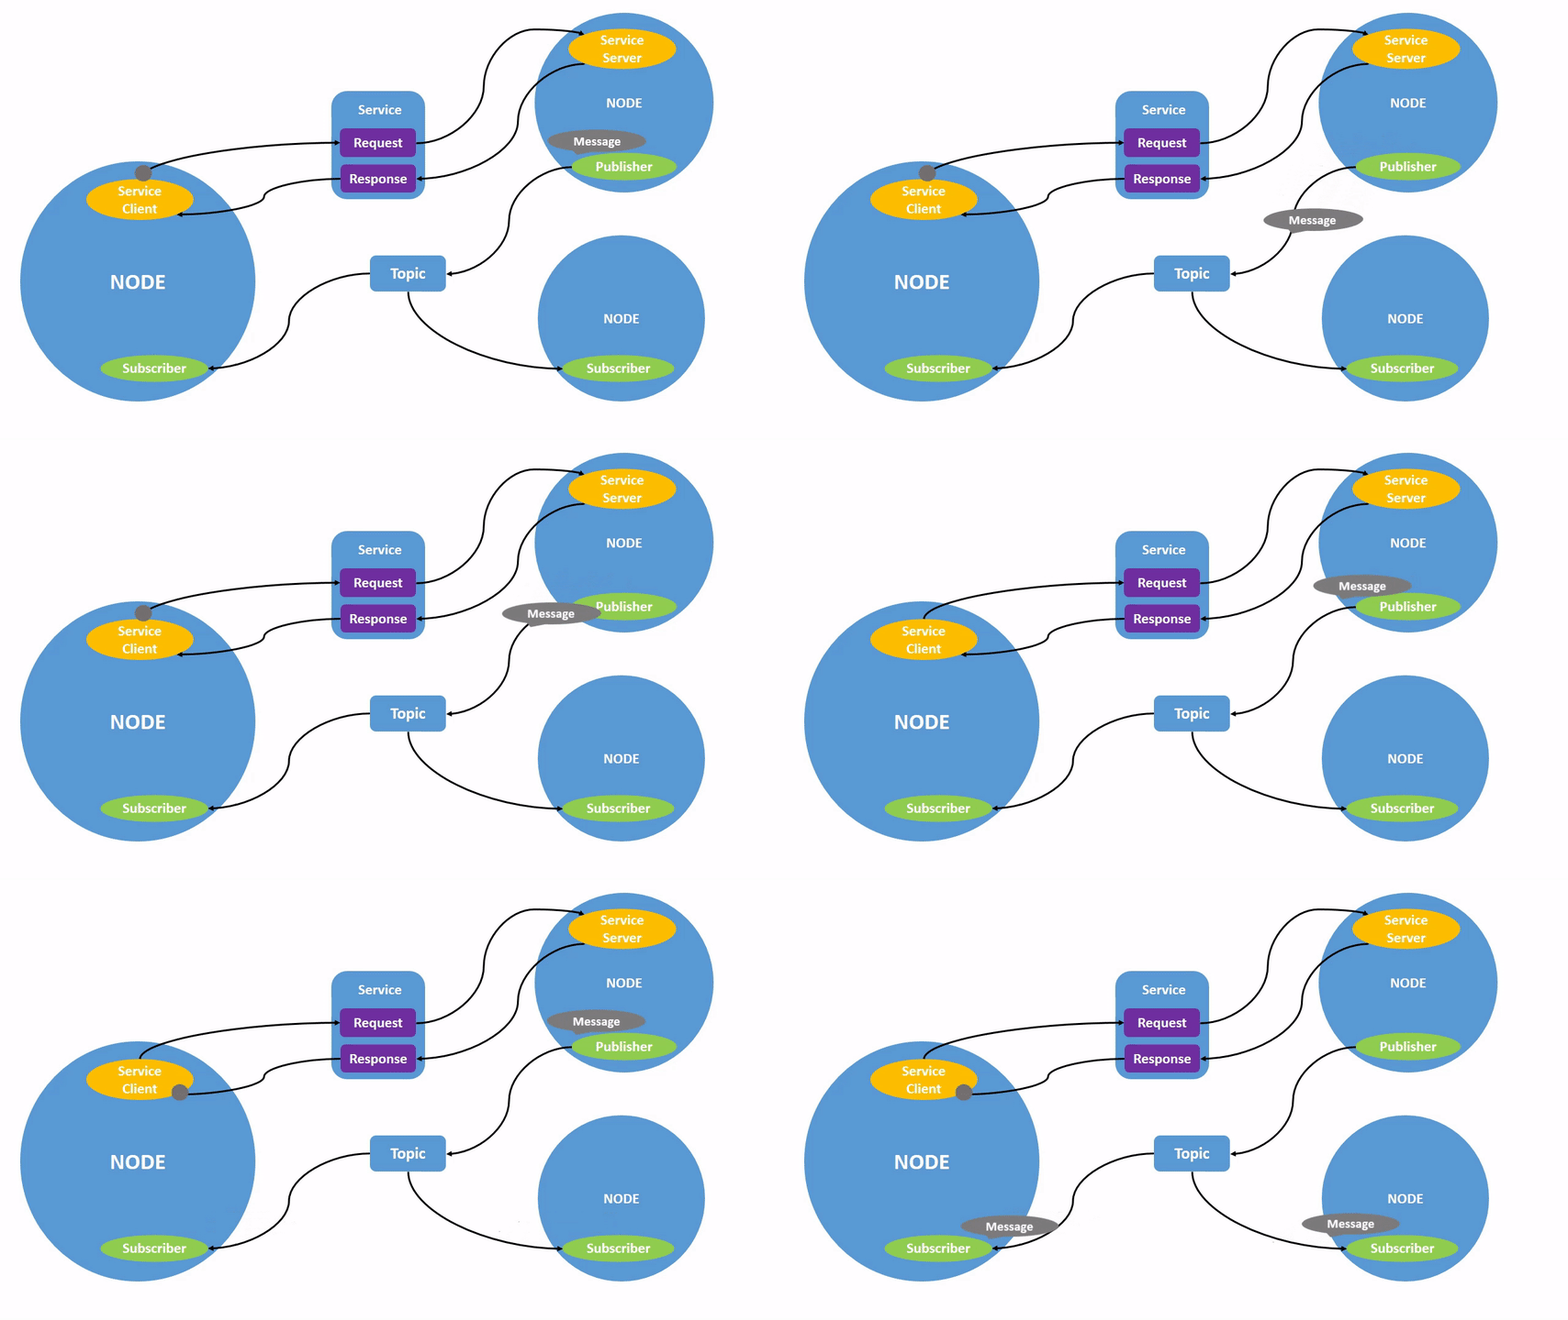
Over the next few tutorials, you will learn about a series of core ROS 2 concepts that make up what is referred to as the ROS graph. The ROS graph is a network of ROS 2 programs called nodes which process data together and all run at the same time. The ROS graph thus encompasses all these programs and the connections between them.
A logical starting point to understand the ROS graph is therefore to first study ROS nodes. Ideally, nodes are small programs running in their own process. Each node in ROS should be responsible for a single, modular purpose, e.g. controlling the wheel motors or publishing the sensor data from a laser range-finder.
A ROS system can have tens, hundreds, or even thousands of nodes running concurrently. Moreover, a ROS system can have multiple copies of the same node running concurrently on the same system. In the case of our turtle simulation we can actually create multiple turtles, each with their own node, all running the exact same program. Each node can send and receive data from other nodes via topics, services, actions, or parameters.

5.4.1. Starting a node#
You create your ROS Graph by simply starting to run a ROS node.
You already encountered how to run a node in a package in the very first turtlesim example section.
Remember that the ros2 run command can be used to start running an executable from a package.
$ ros2 run <package_name> <executable_name>
Note
As always, don’t forget to source your ROS 2 environment in every new terminal you open.
As before, let’s run turtlesim.
The package name is turtlesim and the executable name is turtlesim_node.
Open a new terminal, and enter the following command:
$ ros2 run turtlesim turtlesim_node
You should now see a turtlesim window again, as before.
At this point, we should have a ROS graph consisting of a single node running the turtlesim_node process.
5.4.2. Interacting with existing nodes in the graph#
We can interact with nodes in the graph using the ros2 node command.
You can use the --help switch behind any ros2 <command> to get a quick overview
of what sub-commands the CLI tool provides.
In a new terminal, examine what ros2 node has to offer by asking for help:
$ ros2 node --help
usage: ros2 node [-h]
                 Call `ros2 node <command> -h` for more detailed usage. ...

Various node related sub-commands

optional arguments:
  -h, --help            show this help message and exit

Commands:
  info  Output information about a node
  list  Output a list of available nodes

  Call `ros2 node <command> -h` for more detailed usage.
Note the listed sub-commands info and list.
We will explore ros2 node list first,
but before that we need to explain a bit about node names.
5.4.3. Names and namespaces#
Each running node will have a name to identify it within the ROS graph.
For example, often a node’s name is also used in the names of any topics it publishes to or to identify the ROS parameters specific to that node. This is not a hard rule though: nodes can also use topics, services, parameters, etc. that are not associated with their name; ROS supports a lot of flexibility. Topics and parameters will be discussed in more detail in later sections.
Knowing (or explicitly setting) the name of a node is important because it allows you to address a specific node in the case where multiple instances (processes) of the same node (program) are running.
ROS supports using namespaces for naming ROS nodes.
Namespaces group related node names together in a hierarchical structure, using the / symbol to separate different levels in the namespace.
This is very similar to the filesystem in Linux.
Also similar to Linux, the root of any namespace in ROS is also just /.
A node called foobar that is placed in the top of the name hierarchy can therefore also be referred to as /foobar, to show it directly follows the root.
If we would have two nodes related to our robot’s navigation stack, we could group these under a /nav namespace simply by naming the nodes /nav/foo and /nav/bar, for instance.
Important
As you will later see in the manual, namespaces are used a lot in ROS! There are not only used for nodes, but also for:
topic names
service and action names
parameter names
interface names
spatial reference frame names (so called “tf2” frame_ids)
…
You will encounter these in later sections of the manual.
Every time, you will notice that these names (can) use /s to separate levels in a namespace.
Be aware however that these are all distinct namespaces!
This means you could have a node called /foo/bar, and also a topic called /foo/bar, and of course a node is not the same thing as a topic!
This distinction can be confusing for novice ROS users (and also for more experienced ones).
It is the context that determines if a name is used to refer to a node or a topic, or something else:
ros2 node info /foo/barrefers to a node called/foo/barros2 topic info /foo/barrefers to a topic called/foo/bar
Remember that it is just a choice of how we want to name our nodes, topics, parameters, etc. Often, these different namespaces will have pretty similar structures, though not exactly the same, because they map to similar logical structures in our robot’s system design.
5.4.4. Listing all running nodes#
For example, ros2 node list will show you the names of all running nodes.
This is especially useful when you want to interact with a node or when you have a system running many nodes and need to keep track of them.
We still don’t know the (default) name of the node we created just now.
Open a new terminal while turtlesim is still running in the other one and enter the following command:
$ ros2 node list
/turtlesim
From this output we can there is only one node with the name /turtlesim.
Warning
This is the default name that any turtlesim_node will use to identify itself in the ROS graph.
This happens to be the same name as the package, turtlesim.
While this is of course not a complete coincidence but a deliberate decision from the designers of the turtlesim package,
it might give the impression that all nodes will always take their name from the package.
This is not true! Rememeber that we can give a node “any” name (within what the naming rules allow), if we wish. Still, it can often be useful to use similar node names as the packages if that helps us from keeping an overview of what is running. However, when we run multiple instances of the same node we would want to make sure each of those processes has a unique name.
5.4.5. Starting a second node#
Open another new terminal and start a teleop node with the command:
$ ros2 run turtlesim turtle_teleop_key
Remember we are referring to the turtlesim package again, but this time we target the executable named turtle_teleop_key.
Return to the terminal where you ran ros2 node list and run it again.
You will now see the names of two active nodes:
/turtlesim
/teleop_turtle
5.4.6. Remapping node names#
Remapping allows you to reassign default node properties, like node name, topic names, service names, etc., to custom values.
In fact, in an earlier introductory tutorial we remapped a topic for the turtle_teleop_key node to change its cmd_vel topic to target turtle2.
This time, we will not remap a topic, but reassign the name of our /turtlesim node.
The process is pretty similar though.
In a new terminal, run the following command:
$ ros2 run turtlesim turtlesim_node --ros-args --remap __node:=my_turtle
Note
You already saw the --ros-args syntax used before when remapping topic names.
Recall that it indicates that everything that follows are not regular arguments for the executable’s custom code to process, but are specifically used to configure just the node’s ROS behavior, such as changing the node’s name or the topic names it advertises on the ROS Graph.
This is a generic mechanism, so the --ros-args command line argument can be used when starting any ROS node.
Since you’re calling ros2 run on turtlesim again, another turtlesim window will open.
However, now if you return to the terminal where you ran ros2 node list, and run it again, you will see three node names:
/my_turtle
/turtlesim
/teleop_turtle
5.4.7. Getting info on a running node#
Now that you know the names of your nodes, you can access more information about them with:
$ ros2 node info <node_name>
To examine your latest node, my_turtle, run the following command:
$ ros2 node info /my_turtle
ros2 node info returns a list of subscribers, publishers, services, and actions, i.e., the ROS graph connections that interact with that node.
The output should look like this:
/my_turtle
  Subscribers:
    /parameter_events: rcl_interfaces/msg/ParameterEvent
    /turtle1/cmd_vel: geometry_msgs/msg/Twist
  Publishers:
    /parameter_events: rcl_interfaces/msg/ParameterEvent
    /rosout: rcl_interfaces/msg/Log
    /turtle1/color_sensor: turtlesim/msg/Color
    /turtle1/pose: turtlesim/msg/Pose
  Service Servers:
    /clear: std_srvs/srv/Empty
    /kill: turtlesim/srv/Kill
    /my_turtle/describe_parameters: rcl_interfaces/srv/DescribeParameters
    /my_turtle/get_parameter_types: rcl_interfaces/srv/GetParameterTypes
    /my_turtle/get_parameters: rcl_interfaces/srv/GetParameters
    /my_turtle/list_parameters: rcl_interfaces/srv/ListParameters
    /my_turtle/set_parameters: rcl_interfaces/srv/SetParameters
    /my_turtle/set_parameters_atomically: rcl_interfaces/srv/SetParametersAtomically
    /reset: std_srvs/srv/Empty
    /spawn: turtlesim/srv/Spawn
    /turtle1/set_pen: turtlesim/srv/SetPen
    /turtle1/teleport_absolute: turtlesim/srv/TeleportAbsolute
    /turtle1/teleport_relative: turtlesim/srv/TeleportRelative
  Service Clients:

  Action Servers:
    /turtle1/rotate_absolute: turtlesim/action/RotateAbsolute
  Action Clients:
Tip
Wow, that’s a lot of information! Don’t worry: publishers, subscribers, services and actions will be discussed in later sections.
Now try running the same command on the /teleop_turtle node.
How do its connections differ from my_turtle?
5.4.8. Summary#
A node is a fundamental ROS 2 element that serves a single, modular purpose in a robotics system.
You learned about node names and namespaces,
how to use ros2 node list to discover active node names, and how to use ros2 node info to introspect a single node.
These tools are vital to understanding the flow of data in a complex, real-world robot system.
